
Configuring the Workiva Integration
How to Connect your SINAI Carbon Accounting to Workiva
Looking to simplify your sustainability reporting? By integrating SINAI with Workiva, you can now import your emissions data effortlessly into a Workiva table, saving time, reducing manual errors, and ensuring audit-ready accuracy for your Environment, Social, and Governance (ESG) or sustainability reporting needs.
While Workiva accepts various data types, this guide shows you how to import monthly emissions summary data into a Wdata table using the /v1/carbon_accounting/summaries/monthly_detailed_emissions_summaries API endpoint.
See SINAI API for the complete list of endpoints you can use to retrieve data.
Getting Started
- Set up your Workiva workspace
- Contact SINAI support to obtain an API key and Master SINAI Chain template
Step 1: Create a Wdata table to store your monthly emissions summary data
- Navigate to Wdata and click Create > Table.
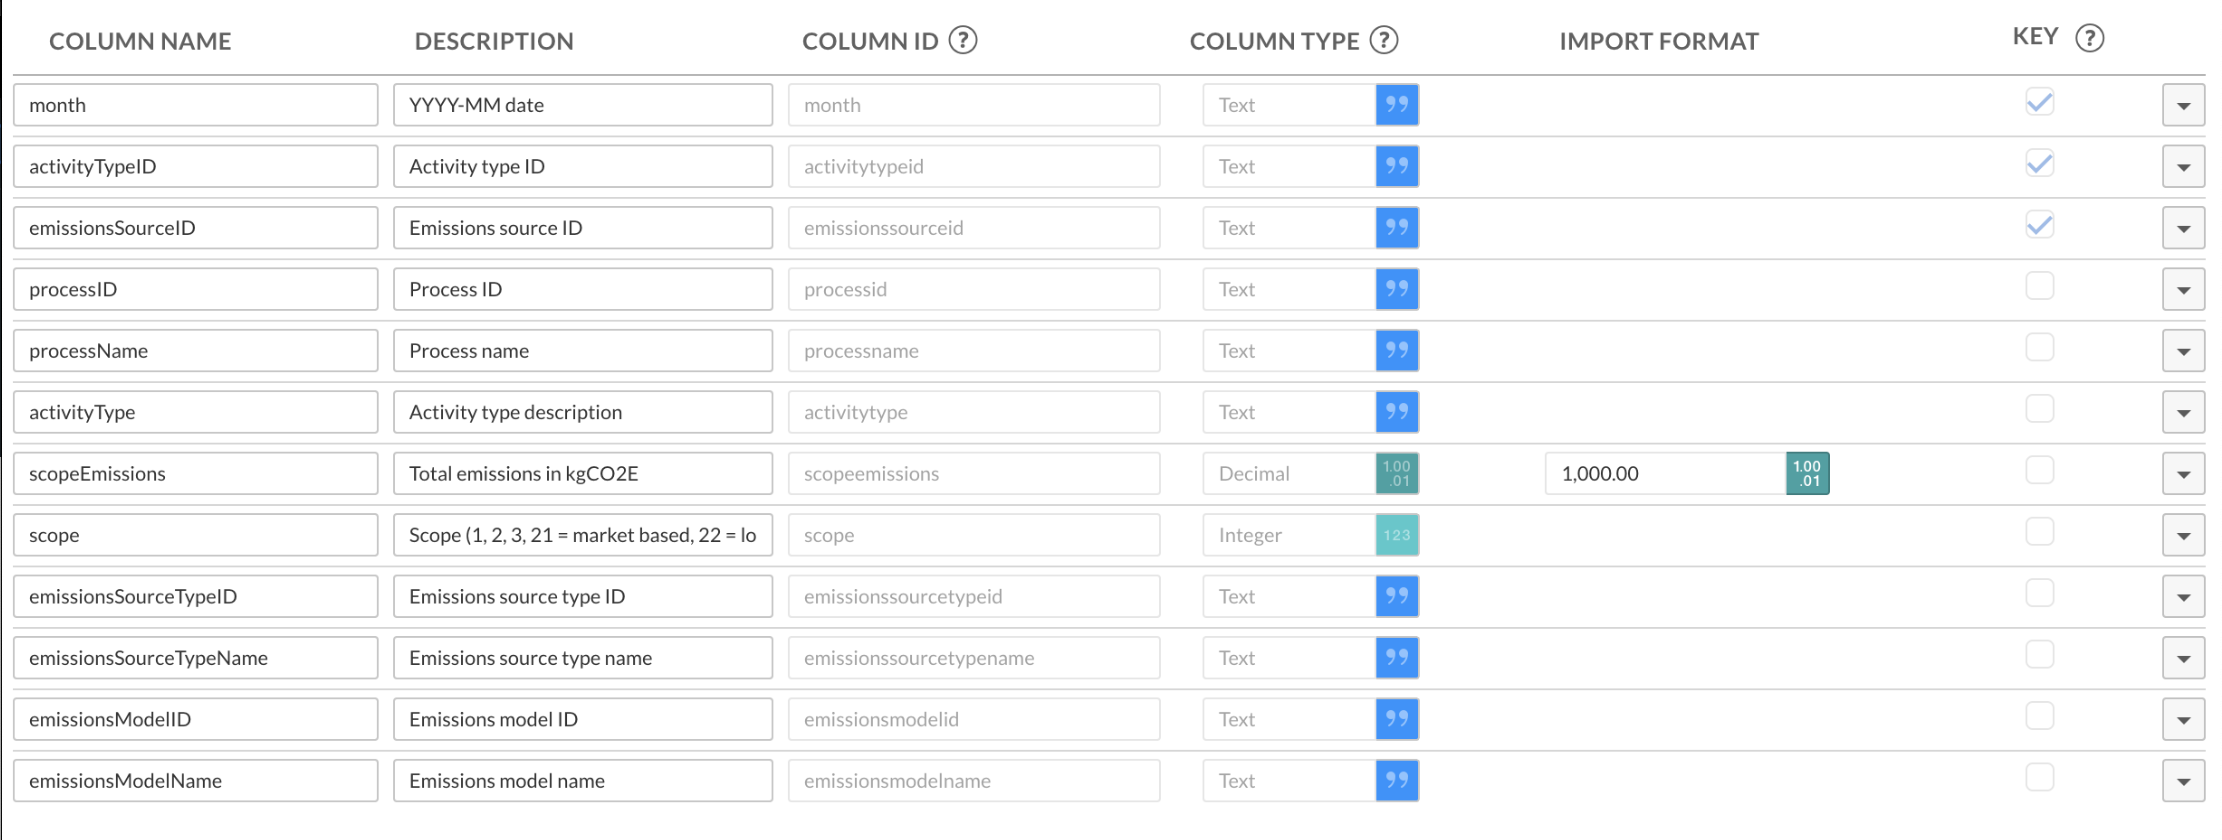
- Set up your table as a Dimension table with any column IDs that are equal to the lowercased field names in the /v1/carbon_accounting/summaries/monthly_detailed_emissions_summaries response, depending on the data you want to retrieve.
- The data from this endpoint is uniquely defined by month, activityTypeID, and emissionsSourceID, so those columns should all be present and marked as KEY
- Click Save
- You may want to create multiple tables depending on your use case. The Master SINAI Chain assumes the existence of three tables, two for scopeEmissions and one where scopeEmissions is replaced by energyConsumption.
Step 2: Import and configure the SINAI Chain
-
Navigate to Chains
-
Click Import
-
Select the Master SINAI Chain and go through the import wizard flow, leaving the defaults in place (though feel free to change the names of the imported chains)
This will import the Master SINAI Chain and its two sub-chains for adding and replacing Wdata datasets; feel free to delete these sub-chains if you already have copies -
You should see a chain like this:
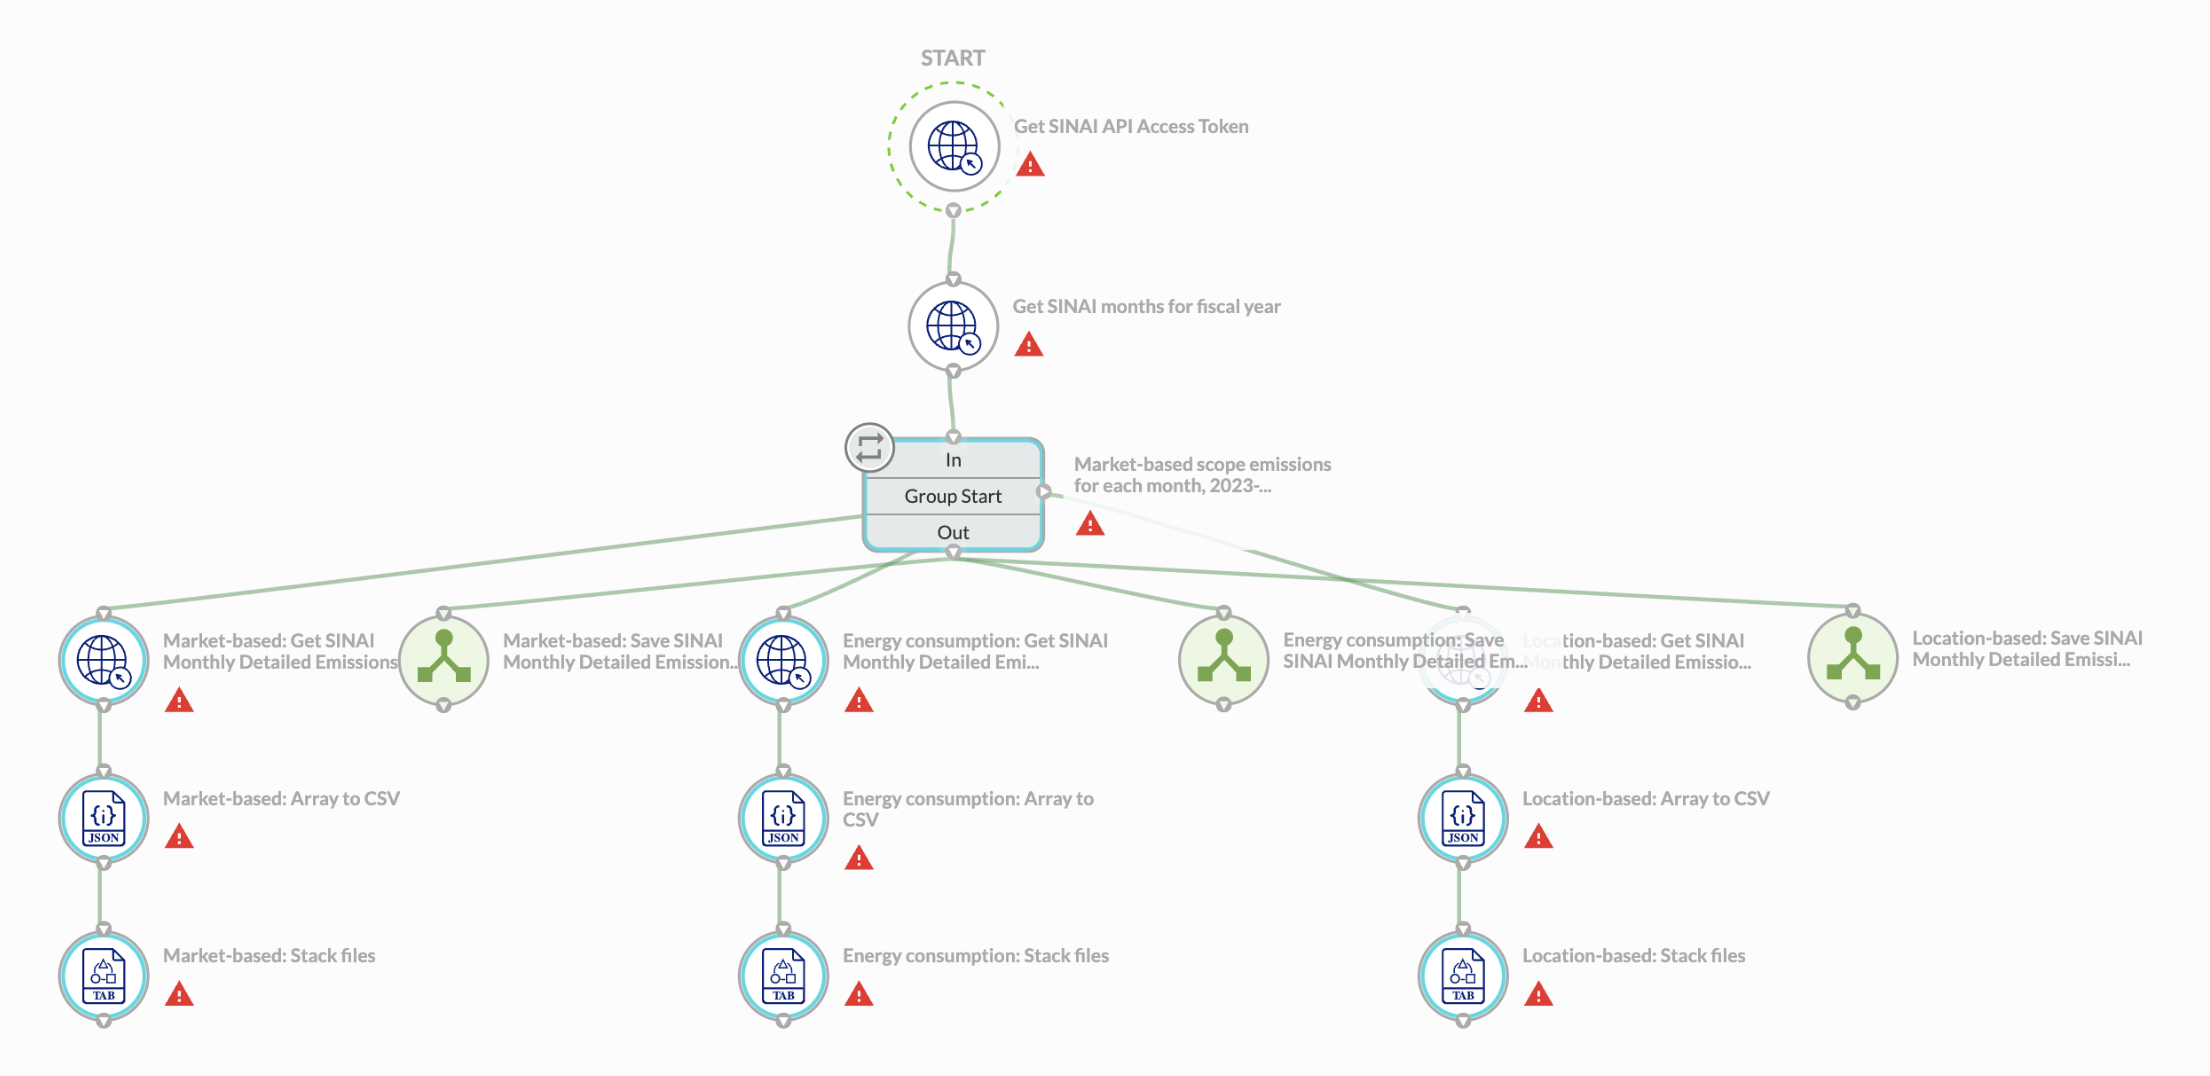
- Save each node to remove the warning
- When you node to save the dataset, make sure to select the Replace Dataset chain to run and input the correct table ID. The table ID is the last part of the path in the URL in the Wdata table view.
- In Settings in the upper right, ensure you have the following configured correctly. This is information you will need from SINAI:
- SINAI API Client ID
- SINAI API Client Secret
- Org ID
- Fiscal year (your choice)

Step 3: Publish and execute
- Publish your chain using the button in the upper right.
- Then, press Execute
- You should see the chain execute, and after a few minutes, your data should appear back in the Wdata table or other tables you configured in Step 1.
Step 4: Check Your Carbon Accounting Data Table in Workiva
Once your Carbon Accounting data is successfully uploaded to Wdata:
- Navigate to Wdata > Tables and select your emissions table.
- Check Data Consistency
- Look for gaps, outliers, or formatting issues.
- Confirm that the reporting periods align with your expected fiscal or calendar cycles
- Use Filters and Views
- Apply filters to focus on specific time periods, emission scopes, or business units
- Save custom views for recurring analyses or visualizations.
4.Link to ESG Reports - Use Workiva’s linking tools to dynamically pull data from the table into sustainability disclosures, board reports, or investor decks.
Updated about 1 year ago